
How to apply a bandage to a hip?
Leave a message

Howdy, folks! I'm here as a bandage supplier to talk about something important - how to apply a bandage to a hip. It might sound like a no - brainer, but applying a bandage correctly to the hip area can make a huge difference in supporting an injury, reducing pain, and aiding in the healing process.
First off, let's understand why we need to bandage the hip properly. The hip is a major joint in our body. It bears a significant amount of our body weight and is involved in almost all of our movements, like walking, running, and sitting. When the hip gets injured, whether it's a sprain, strain, or a post - surgical wound, a well - applied bandage can provide essential support. It decreases motion at the injury site, which helps to minimize pain and swelling. It also keeps the affected area stable, allowing the body to heal more effectively.
Now, let's get into the nitty - gritty of what types of bandages are suitable for the hip. There are a few great options out there.


One of them is the Plaster Of Paris Slab. This type of bandage is often used for more serious injuries where a high level of immobilization is needed. It's made from plaster, which hardens after application, creating a solid and sturdy support for the hip. It's great for fractures or severe sprains where you don't want the hip joint to move at all.
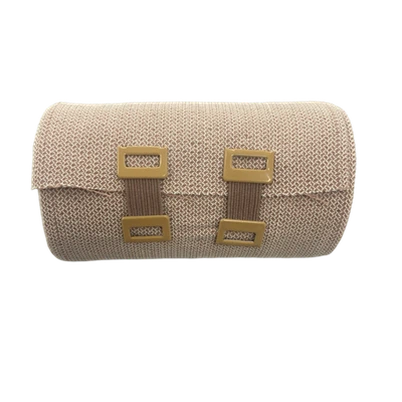
Another option is the EAB Bandage. EAB stands for Elastic Adhesive Bandage. This bandage is stretchy, which means it can conform to the shape of the hip easily. It provides a good amount of support while still allowing some movement. It's useful for milder sprains and strains, or for post - surgical support when you need to keep the area compressed but still want a bit of flexibility.
The Tubular Elastic Net Bandage is also a good choice. It's lightweight and breathable, making it comfortable to wear for long periods. It's often used to hold dressings in place on the hip or to provide a gentle support layer. It's less restrictive than a plaster slab and can be great for minor abrasions or as a secondary layer under other bandages.
Alright, let's start with the steps to apply a bandage to the hip.
Step 1: Preparation
Before you start applying the bandage, you need to make sure the hip area is clean and dry. Remove any clothing or debris that could interfere with the bandage. If there's a wound, gently clean it with mild soap and water, and apply a sterile dressing if necessary. Also, gather all your supplies, including the appropriate bandage, scissors, and any other items you might need.
Step 2: Positioning
Get the person in a comfortable position. Usually, lying on their back or side works well. If it's your own hip, try to find a stable surface to lie on. You want to make sure the hip is relaxed and in a natural position.
Step 3: Applying the Bandage
- For the Plaster Of Paris Slab:
- First, cut the plaster slab to the appropriate size. Make sure it covers the injured area of the hip.
- Soak the plaster slab in water until it's thoroughly wet.
- Carefully wrap it around the hip, starting from the bottom and working your way up. Make sure it's evenly distributed and not too tight or too loose.
- Smooth out any wrinkles, and let it dry. This can take a little while, so be patient. While it's drying, make sure the person doesn't move their hip too much.
- For the EAB Bandage:
- Start at the outside of the hip, just above the thigh. Hold the end of the bandage in place and begin to wrap it around the hip in a diagonal pattern.
- As you wrap, overlap each layer by about half of the bandage width. This helps to create a secure and even compression.
- Keep wrapping until you've covered the entire injured area. Make sure the bandage is snug but not so tight that it cuts off circulation. You should be able to slip a finger under the bandage easily.
- Finish by securing the end of the bandage. You can use tape or the adhesive on the bandage itself to hold it in place.
- For the Tubular Elastic Net Bandage:
- First, stretch the tubular bandage slightly.
- Place it over the hip area, starting from the top. Let it fall down gently over the hip, adjusting it so that it covers the injured spot.
- You can use scissors to trim the bandage if it's too long. Make sure it fits well and doesn't bunch up.
Step 4: Checking
After applying the bandage, it's crucial to check for any signs of poor circulation. Look for numbness, tingling, or the area turning pale or blue. If you notice any of these symptoms, it means the bandage is too tight, and you need to loosen it immediately.
Now, I know some of you might be thinking, "How often should I change the bandage?" Well, it depends on the type of bandage and the injury. For a plaster slab, you usually don't change it until the doctor tells you to. For EAB and tubular elastic net bandages, if they get dirty, wet, or start to lose their elasticity, it's a good idea to change them. Also, if the wound under the bandage needs to be cleaned or checked, you'll need to remove and re - apply the bandage.
As a bandage supplier, I can tell you that we offer high - quality bandages that are reliable and effective. Whether you're a medical professional, an athlete looking for injury support, or just someone who wants to be prepared for minor accidents at home, our bandages are a great choice.
If you're interested in purchasing our bandages, we're more than happy to talk to you. We can discuss your specific needs, the quantity you require, and the best options for your situation. Just reach out to us for a friendly chat and let's see how we can help you keep the hip and other body parts in good shape with our top - notch bandages.
References
- Medical textbooks on orthopedic injuries
- Professional guidelines on wound care and bandage application