

How to clean a wound before applying a bandage?
Leave a message

Cleaning a wound properly before applying a bandage is a crucial step in the wound - care process. As a bandage supplier, I understand the significance of this procedure not only for effective wound healing but also for ensuring that our bandages can perform at their best. In this blog, I will share detailed steps on how to clean a wound before bandaging, along with some important considerations.
Step 1: Gather the Necessary Supplies
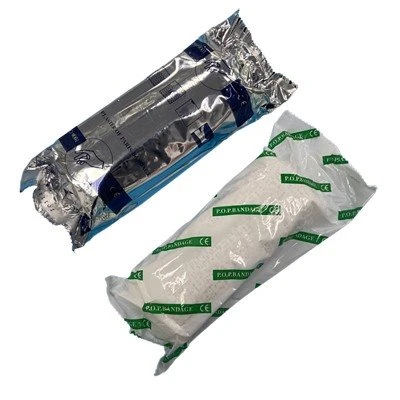
Before you start cleaning the wound, it's essential to have all the required supplies within reach. These typically include clean water (preferably distilled or boiled and cooled water), mild soap, clean towels or gauze pads, disposable gloves, and of course, an appropriate bandage. At our company, we offer a wide range of bandages to suit different wound types. For example, the Elastic Support and Relief Bandage is great for providing support and comfort to sprains and strains, while the Plaster Of Paris Slab is commonly used for immobilizing fractures. The POP Plaster Bandage is also a popular choice for more complex orthopedic applications.
Step 2: Wash Your Hands
Your hands can carry a multitude of bacteria and germs. To prevent introducing these contaminants into the wound, wash your hands thoroughly with soap and water for at least 20 seconds. If soap and water are not available, you can use an alcohol - based hand sanitizer. After washing, put on disposable gloves to further minimize the risk of infection.
Step 3: Assess the Wound
Take a close look at the wound to determine its size, depth, and the presence of any foreign objects. Superficial cuts and scrapes may be relatively easy to clean, but deeper wounds or those with embedded debris require more careful attention. If the wound is large, deep, or bleeding heavily, it's advisable to seek medical help immediately.

Step 4: Remove Loose Debris
Gently remove any loose dirt, gravel, or debris from the wound using a pair of clean tweezers. Be careful not to push the debris further into the wound. If the debris is firmly embedded, do not attempt to remove it on your own, as this could cause more damage. Instead, seek professional medical assistance.
Step 5: Rinse the Wound
Hold the wound under a gentle stream of clean water to flush out any remaining debris and bacteria. You can also use a clean syringe filled with water to irrigate the wound. This helps to clean the wound from the inside out. Avoid using harsh antiseptics like hydrogen peroxide or iodine at this stage, as they can damage healthy tissue and delay the healing process.
Step 6: Clean the Surrounding Skin
Using a clean towel or gauze pad dampened with mild soap and water, gently clean the skin around the wound. Start from the edge of the wound and work your way outward. This helps to remove any dirt and bacteria from the surrounding area that could potentially enter the wound. Rinse the area thoroughly with water and pat it dry with a clean towel.
Step 7: Dry the Wound
Gently pat the wound and the surrounding skin dry with a clean, sterile gauze pad or towel. Make sure the area is completely dry before applying the bandage, as moisture can promote the growth of bacteria.
Step 8: Apply an Antibiotic Ointment (Optional)
If desired, you can apply a thin layer of antibiotic ointment to the wound. This can help prevent infection and keep the wound moist, which promotes faster healing. However, be aware that some people may be allergic to certain antibiotics, so it's important to check for any signs of an allergic reaction.
Step 9: Choose the Right Bandage
Select a bandage that is appropriate for the size and type of the wound. For small cuts and scrapes, adhesive bandages may be sufficient. For larger wounds, sterile gauze pads held in place with medical tape or an elastic bandage may be more suitable. Our range of bandages is designed to meet different needs, whether it's for a minor household injury or a more serious medical condition.
Step 10: Apply the Bandage
Place the bandage over the wound and secure it in place. Make sure the bandage is not too tight, as this can restrict blood flow and slow down the healing process. If you are using an elastic bandage, wrap it snugly but not so tightly that it causes discomfort or numbness.
Additional Considerations
- Frequency of Bandage Changes: Change the bandage regularly to keep the wound clean and dry. For most minor wounds, changing the bandage once a day is usually sufficient. However, if the bandage becomes wet, dirty, or soaked with blood, it should be changed immediately.
- Signs of Infection: Keep an eye out for signs of infection, such as increased pain, redness, swelling, pus, or a fever. If you notice any of these symptoms, seek medical attention right away.
- Proper Storage of Bandages: Store your bandages in a cool, dry place away from direct sunlight. This helps to maintain their sterility and effectiveness.
As a bandage supplier, we are committed to providing high - quality bandages that meet the highest standards of safety and performance. Our products are designed to support the wound - healing process and help you recover as quickly as possible. If you are interested in learning more about our bandage products or have any questions regarding wound care, please don't hesitate to reach out. We are always ready to assist you in finding the best solutions for your needs. Whether you are a healthcare professional, a sports team, or an individual looking for reliable wound - care products, we have the right bandages for you.
References
- American Academy of Dermatology Association. (2023). First aid for cuts and scrapes.
- World Health Organization. (2022). Guidelines on hand hygiene in health care.


